送修的Mac回來,原來的硬碟有些問題,只好重裝系統。
剛好Oracle剛發佈新版的MySQL,就順便換裝看看,沒想到一直無法正常起動。
查了下說明,原來要手動改/usr/local/mysql/support-files/mysql.server
把
basedir=
datadir=
改為
basedir=/usr/local/mysql
datadir=/usr/local/mysql/data
即可
送修的Mac回來,原來的硬碟有些問題,只好重裝系統。
剛好Oracle剛發佈新版的MySQL,就順便換裝看看,沒想到一直無法正常起動。
查了下說明,原來要手動改/usr/local/mysql/support-files/mysql.server
把
basedir=
datadir=
改為
basedir=/usr/local/mysql
datadir=/usr/local/mysql/data
即可
個人覺得,工程師在工作時,所有要處理的事最好都能在IDE裡完成,這樣比較不易被其他事情中斷,因為每次的Switch一定是要花些成本的。
工作的分派也是,今天有什麼Task要處理或是Bug要修,如果可以在IDE裡取得,完成後也在IDE裡回報,這應該是比較理想的。Redmine Mylyn Connector 就提供Eclipse 這樣的 Plugin,讓我們將Redmine當做Mylyn的repository,方便我們回報各種工作情況。
cd /usr/share/redmine
sudo ruby script/plugin install git://redmin-mylyncon.git.sourceforge.net/gitroot/redmin-mylyncon/redmine-mylyn-connector
然後要將redmine 的REST功能加打,登入redmine的administration後將"Enable REST web service"打勾儲存。
2. Eclipse方面:
加個新的Eclipse Plugin Repository
http://redmin-mylyncon.sourceforge.net/update-site/N/
然後就可以試試兩邊的整合

3. 加個新的issue吧
注意這個Task的Status是"New", Assigned 給"lab engineer"
4.回到Eclipse,先在"Task"上選擇新增一個Repository
然後Eclipse會列出目前可用的Repository型態,因為我們有多裝了Redmine的Connector,所以會較原來多個選項

當然是選Redmine這類型囉
再來會要求我們填入Redmine Server相關的資料,主要是"Server","User ID","Password","Save Password"也不要忘了勾起來,再按下“Validate Settings“確認無誤後按下“Finish“即可

5.建立Repository Query
經過Step 4後,Redmine Plugin會詢問是要要建立一個Task Query,這時當然是選"Yes",

接下來就輸入Query名稱及選取要篩選的條件後按下“Finish“
我們就能在Task List看到符合條件的Task了
6. Task處理完後只要填入適當資料,然後按下"Submit"就會回傳給Redmine Server囉
看看Redmine Server上task的status,
已經隨我們剛才的更動而更新
個人覺得,每間軟體公司應該都要有一個Issue Tracking System,有了Issue Tracking System,專案才方便進行Planning、Development及Evaluation的流程管理。當然也有人覺得,用Microsoft Project或Excel等工具也就夠了,這點我也沒什麼特別的意見,但也許考慮嘗試使用一下Open Source的Issue Tracking System後,可以發現這類工具的助益遠大於你一開始的想像。
以往我個人認為比較好用的Issue tracking system大概只有JIRA,其他如Trac、Mantis或Bugzilla之類的,通常是公司或專案已經在使用,就跟著用就是。雖然我也不是對JIRA有什麼特別的喜好,因為我再怎麼用也不過就是基本的工作指派或是問題回報;不過JIRA額外提供了設定專案不同階段(version)所應該完成的功能(future),而且也能與多種SCM結合,分析member每次的commit是與哪個issue相關,再加上這是由Java寫的,格外有親切感...喔,不,有親切感的原因是許多Java Open Source 也都使用JIRA做為issue tracking system,所以用起來相當容易上手。但JIRA最大的缺點是-它要收費,而且還不便宜。
http://www.redmine.org/wiki/redmine/HowTo_Install_Redmine_in_Ubuntu
,第一種是透過mod_cgi,這方式我試了,無論是mod_cgi與mod_fcgi都無法成功...第二種是透過passenger,這就容易多了,簡單操作指令如下
0.安裝redmine前請先確認apache2與mysql(postgresql 或 sqlite也OK)都能正常操作
1.安裝redmine、redmine-mysql及libapache2-mod-passenger
sudo apt-get install redmine redmine-mysql libapache2-mod-passenger
sudo ln -s /usr/share/redmine/public /var/www/redmine
sudo vim /etc/apache2/sites-available/default
<Directory /var/www/redmine>
 RailsBaseURI /redmine
 PassengerResolveSymlinksInDocumentRoot on
</Directory>
重起apache2後以browser連結http://${host}/redmine,登入帳號密碼預設為redmine:redmine,接下來就可以新建User及Project,看看Redmine的功能囉。
Maven3 的 maven-site-plugin已將關於reporting的邏輯移除,所以如果用原先給maven2用的pom.xml,雖然可以執行,但除了用Doxia的report可以跑出結果來,其餘的report都不會產生。
要跑出先前的report就必需修改下pom.xml,Maven的report主要有分兩類,一是Project Information、另一則是Project Report,Information就是專案成員名單、使用的library、Issue Tracking等相關資訊,而Report則是其他外掛的Changelog、Unit test Surefire、CodeCoverage Emma等report,maven2的是將其分為兩部份控制,information是內建的,只要敲個mvn site就一定有,其他的report就必需在<reporting />中掛上plugin,而maven3的設定則希望全部在maven-site-plugin中加以控制,這是兩者比較大的分別。
直接看看maven3的設定項目吧,請記得下列所有report的<version />皆可以不指定
<project>
 <build>
  <plugins>
   <plugin>
    <groupid>org.apache.maven.plugins</groupid>
    <artifactid>maven-site-plugin</artifactid>
    <version>3.0-beta-3</version>
    <configuration>
     <reportplugins>
      <!-- maven-project-info-reports-plugin即是指供project information的plugin -->
      <plugin>
       <groupid>org.apache.maven.plugins</groupid>
       <artifactid>maven-project-info-reports-plugin</artifactid>
       <!-- 可不指定version -->
       <version>2.2</version>
       <!-- dependencyDetailsEnabled 及 dependencyLocationsEnabled 設為false
       時會讓 dependencies report 少產生部份資訊-->
       <configuration>
        <dependencydetailsenabled>true</dependencydetailsenabled>
        <dependencylocationsenabled>true</dependencylocationsenabled>
       </configuration>
       <!-- 基本的information report都在下面了,若有不需要看的就mark掉就好 -->
       <reports>
        <report>cim</report>
        <report>dependencies</report>
        <report>index</report>
        <report>issue-tracking</report>
        <report>license</report>
        <report>mailing-list</report>
        <report>plugin-management</report>
        <report>plugins</report>
        <report>project-team</report>
        <report>scm</report>
        <report>summary</report>
       </reports>
      </plugin>

      <!-- 以下為其他外掛的report plugin 設定處,version可以拿掉 -->
      <plugin>
       <groupid>org.apache.maven.plugins</groupid>
       <artifactid>maven-surefire-report-plugin</artifactid>
       <version>2.6</version>
      </plugin>
      <plugin>
       <groupid>org.apache.maven.plugins</groupid>
       <artifactid>maven-changelog-plugin</artifactid>
       <version>2.2</version>
      </plugin>
     </reportplugins>
    </configuration>
   </plugin>
  </plugins>
 </build>
</project>
</project>個人覺得,工作可以是一種信仰、一種宗教,而一間公司可能同時存在有多種信仰;
信仰間是會有衝突的,有些信仰無法容下其他的信仰而有衝突,發生衝突時也難免會因較為激進的派系而交火;在人數極多時,我想這無可避免。
但如果一間人數極少而每個人竟都有不同的信仰,這個組合應該是一件蠢事。
這蠢事居然就在我眼前。
蠢!
Tiles是一個分割網頁的Library,提供了一個除了使用<jsp:include>之外的JSP組合工具;
透過xml設定檔,將重覆不需變動的頁面分割後定為Template,讓開發人員專注在各個模組中不同的頁面並使其具有組合性。
通常一個頁面基本的格局大概如下圖

這次的Demo就以table來分割而不以div方式來制定,簡單的html如下
<html>
<head>
<meta content="text/html; charset=UTF-8" http-equiv="Content-Type" />
<title></title>
</head>
<body>
<table>
 <tr>
  <td colspan="2">Header</td>
 </tr>
 <tr>
  <td>Menu</td><td>Body</td>
 </tr>
 <tr>
  <td colspan="2">Footer</td>
 </tr>
</table>
</body>
</html>
寫成JSP的include大概會變成下面這樣
<%@ page language="java" pageEncoding="UTF-8"%>
<html>
<head>
<meta content="text/html; charset=UTF-8" http-equiv="Content-Type" />
<title></title>
</head>
<body>
<table>
 <tr>
  <td colspan="2"><jsp:include file="/WEB-INF/jsp/common/header.jsp"></jsp:include></td>
 </tr>
 <tr>
  <td><jsp:include file="/WEB-INF/jsp/common/menu.jsp"></jsp:include></td><td>Body</td>
 </tr>
 <tr>
  <td colspan="2"><jsp:include file="/WEB-INF/jsp/common/footer.jsp"></jsp:include></td>
 </tr>
</table>
</body>
</html>
看起來還不錯,但是個一個jsp都必需重覆include header,menu,footer這三個jsp,而且萬一哪天出了什麼事,例如要加個ad在畫面的最右側,那所有的jsp都必需要被修正.....嗯,如果以部份認為PG死不完,班是應該的管理人員來看,也許也不是什麼大事吧....
但是Tiles提供了一個反其道而行的方式,先要求我們產生一個基本的jsp做為layout,將header,menu,body,footer當成是變數,再利用xml設定每個變數是要指到哪一個jsp,就讓我們一步一步看下去(。。。有點藍色xx網的感覺
(1)Library
先在pom.xml中加入要使用的library,如果僅是使用基本的tiles功能,只要加入一項即可
<dependency>
<dependency>
    <groupid>org.apache.tiles</groupid>
    <artifactid>tiles-jsp</artifactid>
    <version>2.2.2</version>
</dependency>
(2)建立Template Layout JSP -- layout.jsp
簡單來說,就是利用tiles:insertAttribute來取代jsp:include
加入ignore="true"代表可以不給值。
<%@ include file="/WEB-INF/jsp/common/base.jsp"%>
<!DOCTYPE html PUBLIC "-//W3C//DTD HTML 4.01 Transitional//EN" "http://www.w3.org/TR/html4/loose.dtd">
<html>
<head>
<meta content="text/html; charset=UTF-8" http-equiv="Content-Type" />
<title><tiles:insertattribute ignore="true" name="title"></tiles:insertattribute></title>
</head>
<body>
<table>
 <tr>
  <td colspan="2"><tiles:insertattribute name="header"> </tiles:insertattribute></td>
 </tr>
 <tr>
  <td><tiles:insertattribute name="menu"></tiles:insertattribute></td><td><tiles:insertattribute name="body"></tiles:insertattribute></td>
 </tr>
 <tr>
  <td colspan="2"><tiles:insertattribute name="footer"></tiles:insertattribute></td>
 </tr>
</table>
</body>
</html>
(3)設定Tiles的Template XML -- tiles.xml
<?xml version="1.0" encoding="UTF-8"?>
<!DOCTYPE tiles-definitions PUBLIC "-//Apache Software Foundation//DTD Tiles Configuration 2.0//EN" "http://tiles.apache.org/dtds/tiles-config_2_0.dtd">
<tiles-definitions>
    <!--採用/WEB-INF/jsp/common/layout.jsp做為基本版型,-->
 <definition name="base.definition" template="/WEB-INF/jsp/common/layout.jsp">
  <put-attribute name="title" value="">
  </put-attribute><put-attribute name="header" value="/WEB-INF/jsp/common/header.jsp">
  </put-attribute><put-attribute name="menu" value="/WEB-INF/jsp/common/menu.jsp">
  </put-attribute><put-attribute name="body" value="">
  </put-attribute><put-attribute name="footer" value="/WEB-INF/jsp/common/footer.jsp">
 </put-attribute></definition>
    <!-- 延用基本版型,改變title與body的值 -->
 <definition name="hello" extends="base.definition">
  <put-attribute name="title" value="Say Hello to Tiles">
  </put-attribute><put-attribute name="body" value="/WEB-INF/jsp/helloTiles.jsp">
 </put-attribute></definition>
</tiles-definitions>
而其中/WEB-INF/jsp/common/下的header.jsp,menu.jsp,footer.jsp,helloTiles.jsp就隨你寫入內容囉
(4)更改SpringMVC 的ViewReslover -- spring-servlet.xml
將先前採用的JstlView改為TilesView,並加入tilesConfigurer指定tiles設定檔
<bean class="org.springframework.web.servlet.view.UrlBasedViewResolver" id="viewResolver">
  <property name="viewClass" value="org.springframework.web.servlet.view.tiles2.TilesView">
 </property></bean>

 <bean class="org.springframework.web.servlet.view.tiles2.TilesConfigurer" id="tilesConfigurer">
  <property name="definitions">
   <list>
    <value>/WEB-INF/tiles.xml</value>
   </list>
  </property>
 </bean>
這樣就完成最簡單的SpringMVC與Tiles設定囉
因為專案需要,但是專案沒有wiki的系統(說來Redmine真的不錯用!),就稍為利用這裡記錄關於SpringMVC想說明的部份
(1)library
要開始一個SpringMVC很容易,第一請先建立一個web project,要利用mvn eclipse:eclipse或直接在ide裡開都ok,pom.xml裡的dependency只需要
 <dependencies>
  <dependency>
   <groupid>org.springframework</groupid>
   <artifactid>spring-webmvc</artifactid>
   <version>3.0.5.RELEASE</version>
  </dependency>
  <dependency>
   <groupid>javax.servlet</groupid>
   <artifactid>jstl</artifactid>
   <version>1.2</version>
  </dependency>
 </dependencies>
(2)web.xml
web.xml也很容易,只要將SpringMVC要用的front controller -- DispatcherServlet喚起就可以,而serlvet-mapping就看你高興,不喜歡以.do結尾也可用asp,php或html來混淆他人...下列的設定代表所有http://host/module/XXXX.do的url皆會由Spring的DispatcherServlet處理
<?xml version="1.0" encoding="UTF-8"?>
<web-app id="WebApp_ID" xsi:schemalocation="http://java.sun.com/xml/ns/javaee http://java.sun.com/xml/ns/javaee/web-app_2_5.xsd" version="2.5" xmlns:xsi="http://www.w3.org/2001/XMLSchema-instance" xmlns="http://java.sun.com/xml/ns/javaee">
 <servlet>
  <servlet-name>spring</servlet-name>
  <servlet-class>org.springframework.web.servlet.DispatcherServlet</servlet-class>
  <load-on-startup>1</load-on-startup>
 </servlet>
 <servlet-mapping>
  <servlet-name>spring</servlet-name>
  <url-pattern>*.do</url-pattern>
 </servlet-mapping>
</web-app>
(3)spring-servlet.xml
如果你有沒有在web.xml利用ContextLoaderListener來載入的spring configuration,SpringMVC則會自動載入/WEB-INF/spring-servlet.xml,如果沒用ContextLoaderListener也找不到該檔就會顯示錯誤
<?xml version="1.0" encoding="UTF-8"?>
<beans xsi:schemalocation="http://www.springframework.org/schema/beans
  http://www.springframework.org/schema/beans/spring-beans-3.0.xsd
  http://www.springframework.org/schema/context
  http://www.springframework.org/schema/context/spring-context-3.0.xsd" xmlns:xsi="http://www.w3.org/2001/XMLSchema-instance" xmlns:context="http://www.springframework.org/schema/context" xmlns="http://www.springframework.org/schema/beans">

 <context:component-scan base-package="idv.elliot.web.controller"/>

 <bean class="org.springframework.web.servlet.view.UrlBasedViewResolver" id="viewResolver">
  <property name="viewClass" value="org.springframework.web.servlet.view.JstlView">
  </property><property name="prefix" value="/WEB-INF/jsp/">
  </property><property name="suffix" value=".jsp">
 </property></bean>
</beans>
簡單來說,利用component-scan來找出利用annotation標示的Spring components,當中也包含了皆下來要提的Controller,然後建立一個viewResolver,這是用最基本的UrlBasedViewResolver
如此一來,當Controller的method回傳abc時,SpringMVC就會將其導向http://host/module/WEB-INF/jsp/abc.jsp
至於為什麼要把jsp放到/WEB-INF/下,則是因為這只要/WEB-INF/裡的所有東西必需是自系統內的servlet forward過去才能取得,一般人無法直接以url接觸到該resource
(4)建立Controller
先用個helloworld吧,Struts用Action,SpringMVC則是用Controller,
而要把Class當SpringMVC的Controller只要在Class前加上@Controller的annotation即可
基本的method則是return ModelAndView,然後在method前加上@RequestMapping的Annotation
下列這個Class說明當使用者輸入http://host/module/sayHello.do時即會呼叫HelloController.sayHello(),而回傳ModelAndView("hello")則是讓SpringMVC的ViewReslover找到對應的jsp。
package idv.elliot.web.controller;

import org.springframework.stereotype.Controller;
import org.springframework.web.bind.annotation.RequestMapping;
import org.springframework.web.servlet.ModelAndView;

@Controller
public class HelloController {

 @RequestMapping("/sayHello")
 public ModelAndView sayHello() {
  return new ModelAndView("hello");
 }
}
(5)hello.jsp
重點是jsp存放的位置,而不是jsp,請記得之前viewResolver的設定,要放在/WEB-INF/jsp/下即可
只要輸入http://host/module/sayHello.do就可以看到結果,而所有專案資料的截圖如下
在專案的後期,要進入大量測試的階段,或是要完成測試要打包完整檔案給客戶時,通常都會在source code上加上一個tag,例如XXX-RC1,XXXX-RELEASE,以方便追踪各項問題,當然透過其他SCM提供的GUI Tools或是Commadn line來執行這種上tag的工作是沒有任何疑慮的,只不過Maven也提供了一個Plugin讓我們可以在沒在錯誤下完成一個Build時一併進行上Tag及其他release的工作,如修改pom.xml的version。
Maven Release Plugin請參考http://maven.apache.org/plugins/maven-release-plugin/index.html
基本上只要在pom.xml的plugin中加上
<plugin>
    <groupid>org.apache.maven.plugins</groupid>
    <artifactid>maven-release-plugin</artifactid>
    <version>2.1</version>
</plugin>
然後在goals裡加上release:prepare即可
執行時會詢問你要簽入的version與tag/label的資料
[INFO] Working directory: /Users/elliot/tmp/target/checkout
[INFO] Checking dependencies and plugins for snapshots ...
What is the release version for "BuildDemo"? (idv.elliot:BuildDemo) 0.0.3: :
What is SCM release tag or label for "BuildDemo"? (idv.elliot:BuildDemo) BuildDemo-0.0.3: :
What is the new development version for "BuildDemo"? (idv.elliot:BuildDemo) 0.0.4-SNAPSHOT: :
當整個build在沒錯誤的情況下結束時,release plugin會依你提共的資訊對source code加上tag,然後修改pom.xml的version,再將pom.xml checkin到SCM中。
如果希望不要出現提示,可以用-D的方式將相關版本資訊帶入,或是修改release.properties,然後在build 時加上--batch-mode即可
例如:
mvn --batch-mode -Dtag=my-proj-1.2 -DreleaseVersion=1.2 -DdevelopmentVersion=2.0-SNAPSHOT release:prepare
通常在Nightly Build的環節,我比較喜歡Clean Build,也就是從Checkout、Compile、Test、Deploy都是一個動作完成的Compile、Test、Deploy都可以靠Maven或Ant完成,但是自VCS中checkout source code就要看plugin的支援程度了。即便是plugin支援度不夠,只要該種VCS有提供command line的模式,我想就能利用shell或script的方式來達到完整的Clean Build。 例如:
git clone [url] #checkout source code from VCS
cd [project]
mvn site -Pprod
<project xsi:schemalocation="http://maven.apache.org/POM/4.0.0 http://maven.apache.org/xsd/maven-4.0.0.xsd" xmlns:xsi="http://www.w3.org/2001/XMLSchema-instance" xmlns="http://maven.apache.org/POM/4.0.0">
  <modelversion>4.0.0</modelversion>

  <groupid>idv.elliot</groupid>
  <artifactid>BuildDemo</artifactid>
  <version>0.0.1-SNAPSHOT</version>
  <packaging>pom</packaging>

  <name>BuildDemo</name>
  <url>http://github.com/ElliotChen/BuildDemo </url>

  <scm>
    <!-- 僅供讀取的Connection URL, 前面必需加上scm:xxx -->
    <connection>scm:git:git://github.com/ElliotChen/BuildDemo.git </connection>
    <!-- 可以執行checkin的Connection URL, 前面必需加上scm:xxx -->
    <developerconnection>scm:git:git://github.com/ElliotChen/BuildDemo.git </developerconnection>
    <url>http://github.com/ElliotChen/BuildDemo </url>
  </scm>
  <build>
    <plugins>
      <plugin>
        <groupid>org.apache.maven.plugins</groupid>
        <artifactid>maven-scm-plugin</artifactid>
        <version>1.3</version>
        <!-- Checkout之後要執行的Goal -->
        <configuration>
          <goals>site</goals>
        </configuration>
      </plugin>
    </plugins>
  </build>
</project>
簡單來說,只要在<scm>裡的<connection>填入SCM checkout source code的url,然後在url之前依你使用的SCM種類加上指定的prefix,然後在<maven-scm-plugin>的<configuration>中填上接下來要執行的goal,最後執行
mvn clean scm:bootstrap這樣就可以看到像下列的輸出:
[INFO] [scm:bootstrap {execution: default-cli}]
[INFO] Removing /Users/elliot/tmp/target/checkout
[INFO] Executing: /bin/sh -c cd /Users/elliot/tmp/target && git clone git://github.com/ElliotChen/BuildDemo.git /Users/elliot/tmp/target/checkout
[INFO] Working directory: /Users/elliot/tmp/target
[INFO] Executing: /bin/sh -c cd /Users/elliot/tmp/target/checkout && git pull git://github.com/ElliotChen/BuildDemo.git master
[INFO] Working directory: /Users/elliot/tmp/target/checkout
[INFO] Executing: /bin/sh -c cd /Users/elliot/tmp/target/checkout && git checkout
[INFO] Working directory: /Users/elliot/tmp/target/checkout
[INFO] Executing: /bin/sh -c cd /Users/elliot/tmp/target/checkout && git ls-files
[INFO] Working directory: /Users/elliot/tmp/target/checkout
[INFO] Scanning for projects...
[INFO] ------------------------------------------------------------------------
[INFO] Building BuildDemo
[INFO]    task-segment: [site]
[INFO] ------------------------------------------------------------------------
[INFO] [site:site {execution: default-site}]最近Support中x信托個金的WebATM案子,非常訝異,SCM checkout出來的source code不能compile,四個環境上跑的是哪個版本也不能確定,環境上的configuration也都不能完全確定哪個是正確的,再來改版時的patch是一個個class複製到deployment目錄下,XML或Properties也都是手動一個個修改....拜託,什麼年代了!?
能用程式做的就不要手動,寫個maven或ant的設定有這麼麻煩嗎?時間要花在更有義意的事情上,減少手動的工作,也減少人為的錯誤,多出來的時間回去陪家人不是更好些嗎....
XML及Properties的變動不外乎兩種方式解決
(1)Merge : 在範本檔案以${變數名}做為標記,然後再為不同環境寫不同的設定檔,為每個變數定出符合該環境的值,在Build的時候將範本與變數檔進行Merge,產生該環境專用的檔案,該檔案應與範本檔案同名
(2)Replace:為不同環境另存不同名的檔案,在Build的時以更名覆蓋的方式產生該環境專用的檔案
Merge的變數值有幾種設定方式
(1)放在系統變數中,範本檔以${env.變數名}取得該值,例如 export profilename=ABC;
(2)放在java 啟動參數數,以 -D變數名=變數值 帶入,範本檔則以${變數名}取得該值,例如 mvn -Dprofilename=ABC
(3)放在pom.xml中,以<properties><變數名>變數值</變數名></properties>設定,範本檔則以${變數名}取得該值,各profile可以自訂不同的properties
(4)放在其他檔案中,以一般java的properties檔案格式設定,如 變數名=變數值,在pom.xml中以<filters><filter>變數值設定檔</filter></filters>,範本檔則以${變數名}取得該值。
簡單看一下Maven的例子,下圖是一個非常簡單的maven project
 其中
其中
conf/prod/env.properties是prod環境Merge用的變數值設定檔案
setting.envname=prod
conf/template/system.properties則是上列所提Merge用的範本檔
profile.name=${profilename} #取自pom.xml中的設定
package.envname=${setting.envname} #取自env.properties
M2=${env.M2_HOME} #取自系統變數
src/main/resource下的兩個檔案則是為了展示利用antrun來執行Replace的操作,裡面的內容隨便設定,只要不一樣即可
再來列出pom.xml中的profiles設定
<profiles>
    <profile>
        <id>prod</id>
        <!-- 在Maven內自訂變數值 -->
        <properties>
            <profilename>PROD</profilename>
        </properties>
        <build>
        <!-- 將變數訂在特定檔案(env.properties) -->
            <filters>
                <filter>${basedir}/conf/prod/env.properties</filter>
            </filters>
            <resources>
                <!-- 系統原用的resource -->
                <resource>
                    <directory>${basedir}/src/main/resources</directory>
                </resource>
    <!-- 因不同環境會有變動的設定檔範本 -->
    <resource>
        <directory>${basedir}/conf/template</directory>
        <filtering>true</filtering>
                </resource>
            </resources>
            <plugins>
            <!-- 利用Ant Run的Copy來取代檔案 -->
                <plugin>
                    <artifactid>maven-antrun-plugin</artifactid>
                    <executions>
                        <execution>
                            <phase>process-resources</phase>
                            <goals>
        <goal>run</goal>
                </goals>
                <configuration>
        <tasks>
            <delete file="${project.build.outputDirectory}/antrun.replace">
            </delete><copy tofile="${project.build.outputDirectory}/antrun.replace" file="${basedir}/src/main/resources/antrun.replace.prod">
        </copy></tasks>
                </configuration>
            </execution>
        </executions>
    </plugin>
            </plugins>
        </build>
    </profile>
</profiles>
</profiles>
再執行 mvn package -Pprod就可以看到結果了
很久之前,承接了一個寫了一半的案子,自專案開始可以測試起就有一個問題,日期時間資料輸出會偶爾有幾筆顯示為很怪的日期,例如是1977/XX/XX,2032/XX/XX,但是怎麼寫Unit Test就是找不出怎麼發生的,當時年紀小,不知道SimpleDateFormat並非Thread Safe,當時在專案最後被逼得花了五天的時間,就是在找這個問題怎麼能重現,最後突然看到Java Doc裡的說明,真的差點流下淚來.....
但是知道SimpleDateFormat不是ThreadSafe後又有另一個問題,要產生一個SimpleDateFormat物件是頗花Resource的,因為裡面包了一個Calendar物件,最初以為使用Clone可以減少消耗Resource,但最後想到,雖然不是Tread Safe,那就讓一個Thread只有一個SimpleDateFormat Instance就好.... 是的,這是我知道有ThreadLocal這東西後才算解決。
簡單的例子如下
public  abstract  class DateUtils {
  private  static  final  Logger logger  = LoggerFactory.getLogger(DateUtils.class );

  private  static  ThreadLocal<simpledateformat> defaultDateFormat  = new  ThreadLocal<simpledateformat>();

  public  static  final  SimpleDateFormat getDefaultDateFormat() {
   if  (null  == defaultDateFormat .get()) {
    defaultDateFormat .set(new  SimpleDateFormat("yyyy/MM/dd" ));
   }

    return   defaultDateFormat.get();
  }

  public  static  final  Date pareseDate(String date) {
   Date result = null ;
   try  {
    result = getDefaultDateFormat().parse(date);
   } catch  (ParseException e) {
     logger .error( "Can't parse {} to Date", date);
   }

   return  result;
  }

  public  static  final  String formatDate(Date date) {
   return  getDefaultDateFormat().format(date);
  }
}
這樣就得以解決Thread Safe與Resource的問題
基本的crud操作,個人是相當喜歡在Search時使用jQuery Form來做ajax submit,將結果指到一個div中顯示,這樣的優點是不是再寫任何程式來保留使用者查詢的條件,因為它根本沒被更新過,特別是一些select/option這類還要去比對的部份就不用再費心。
至於Create、Update這類的就不用麻煩到用ajax submit,但是必需要考慮到duplicate submit的問題,以往會利用些小方法,像是為每一次要輸入的from建一個id,發現目前這id與之前最後一次收到的id相同時,就取消這次的操作,或是直接disable掉可以操作的button,但利用blockUI可以同時達到告知使用者已經在處理中及防止duplicate submit的效果。
下面是簡單的範例筆記
<html>
	<head>
		<title>Form</title>
		<script src="jquery-1.4.2.js" type="text/javascript"></script>
		<script src="jquery.form.js" type="text/javascript"></script>
		<script src="jquery.blockUI.js" type="text/javascript"></script>
	</head>
	<body>
		<div id="main">
			<!--Search Form-->
			<div id="form">
			<script language="javascript">
			$().ready(function(){
				var options = {
					target : "#result",
					success : $.unblockUI
				};

				$("#myForm").submit(function() {
					$(this).ajaxSubmit(options);
					$.blockUI();
					return false;
				});
			});
			</script>
			<form name="myForm" action="result.html" method="post" id="myForm">
				<input name="age" type="text" />
				<input type="submit" value="Search" />
			</form>
			</div>

			<!-- Dispaly result here-->
			<div id="result">
			</div>
		</div>
	</body>
</html> jQuery Validate還有些設定與使用方式可以利用
Debug mode: 在options中,加入debug:true後,即便是所有validation都沒有錯誤也不會行submit,真的是讓人debug用
<script language="JavaScript">
$().ready(function() {
	$("#myForm").validate({
		debug : true
	});
});
</script>
submitHandler:預設的submitHandler是在所有validation都通過後直接執行form.submit(),修改default submitHandler可以做兩件事,一是檢查基本validation難以檢查的資料,二是可以改用ajax或其他方式執行submit,而submit之後也可以利用blockui等其他plugin避免重覆submit
<script language="JavaScript">
$().ready(function() {
	$("#myForm").validate({
		submitHandler : function(form) {
			$(form).ajaxSubmit();
		}
	});
});
</script>
messages:自訂錯誤提示的訊息
<script language="JavaScript">
$().ready(function() {
	$("#myForm").validate({
		rules : {
			name : {required : true},
		},
		messages : {
			name : "Please fill your name here."
		}
	});
});
</script>
增加自訂的validation method,這些method也可以另外寫在一個js檔案以方便其他人共用
<script language="JavaScript">
//新增一個gt的method, param可以是一個陣列
$.validator.methods.gt = function(value, element, param){
	return (value > param);
};
//要求age必需大於5,並加入提示錯誤的message,利用{0},{1}可以代入param裡的值
$().ready(function() {
	$("#myForm").validate({
		rules : {
			age : {
				gt:5
			}
		},
		messages : {
			age : {
				gt : "must be great than {0}"
			}
		}
	});
});
</script>
<script language="JavaScript">
<!--
$().ready(function() {
 $("#myForm").validate();
});
-->
</script>

<input name="age" class="required number" maxlength="3" type="text" id="age" />
<script language="JavaScript">
<!--
$().ready(function() {
 $("#myForm").validate({
  rules : {
   age : {required:true, number:true}
  }
 });
});
-->
</script>







最近這兩個月頗忙,因為要換工作的關係,手上的東西要快點結掉,其中一個案子,在12個工作天左右,寫了大約近8千行的程式,雖然先前對主要流程所訂的lifecycle算是很符合這個案子需要,所在大方向上並沒有什麼問題,但在部份小地方的設計就稍嫌趕了一點。很多東西就是當下想到個大概就動手了,所以有不少程式再回頭看時就覺得有些不當。只是可能沒什麼機會改了.....
對於標題,另外有個想法
You may have a hammer, but not everything is a nail.
Transaction Type:
(1) Resource-local Transaction:Persistence Unit使用native JDBC driver。
(2) JTA Transaction:僅能在JEE Server中使用,可以管理distributed XA Transaction。
CMEM一定使用JTA Transaction,而在JEE Container 中的AMEM則可在兩者中擇一使用,不在JEE Container 中的AMEM僅能使用Resource-local Transaction。
Transaction 與 Persistence Context間的關係:
Synchronization: Persistence Context與Transaction註冊,當Transaction committed 時會通知該Persistence Context,而Persistence Context在收到通知時就應該執行flush將Entity Instances輸出到DB。
Association:Persistence Context與Transaction註冊的動作就是Association,也可以說是在Transaction的scope中啟動Persistence Context。
Propagation:在多個CMEM中的Transaction中共用Persistence Context
與CMEM可以區分為Transaction-Scoped(TRANSACTION)與Extended(EXTENDED)一樣,CMEM可用到的Persistence Context也分為兩類。
Transaction-Scoped Persistence Context:
由CMEM負責,在必要的時候建立TransactionScoped Persistence Context。也就是在CMEM中任意method被呼叫去再確認是否需要。簡單是說,CMEM被動地為每一個Transaction建立一個persistence context,建立的时間點是在CMEM有任意method被呼叫時。
Extended Persistence Context:
基本上由Container負責,當Stateful Session Bean被create時產生,在Stateful Session Bean被removed時結束。與其他Transaction-Scoped的CMEM也能共享此Persistence Context。
而AMEM就可以使用Application-Managed Persistence Contexts。
Application-Managed Persistence Contexts與CMEM使用的Persistence Context最大的差別,在同一個Transaction中,可以存在多個Persistence Contexts。由AMEM自行建立的Transaction可與其他CMEM共享,但如果是要加入其他已建立的Transaction則以joinTransaction()處理。
由於AMEM無法處理Transaction Propagation,所以要共用Persistence Context唯一的辦法就是使用同一個EntityManager instance。而AMEM控制Transaction則是使用EntityTransaction Interface,利用EntityManager.getTransaction()來取得EntityTransaction,再用.begin()、.commit()來控制Transaction。
請記得EntityManager、Persistence Context、Transaction間的差別。
Entity Manager 藉由Persistence Context來控制被管理的Entity Instances,而每個Persistence Context必定由一個Persistence Unit來限制該Context可以管理的Entity Classes種類。
Entity Manager 可以分為兩類
TRANSACTION:主要是配合Stateless Session Bean與JTA Transaction,在每次CMEM的method被呼叫時都去檢查JTA transaction中是不是有Persistence Context,如果有就續用否則就建一個新的。當JTA Transaction commit 時,在persistence context中的entity instances就會自動persist至DB。
EXTENDED:主要是配合Stateful Session Bean,只有當執行到有@Remove標識的method時才會persist 在persistence context中的entity instances。
Application-Managed Entity Manager(以下簡稱AMEM)也很清楚,就是由Application自行管理,藉由呼叫EntityManagerFactory.createEntityManager()來取得AMEM,也因為如此,一般的J2SE程式也可以使用,當然在JEE Container也可以使用,特別是在某些特別情況或有特殊考慮時多一種方式可以應用。如果要在JEE Container中使用的話,與CMEM不同之處是以@PersistenceUnit來標識要被注入的EntityManagerFactory,而且也必需呼叫EntityManager.close()來指出要persist的時機。AMEM產生persistence context的時機也與CMEM有所不同,當呼叫EntityManagerFactory.createEntityManager()就會產生一個persistence context。
不過Transaction並不是只有這麼簡單....
Struts2的Unit Test說容易也是真的不麻煩,但如果希望測試得仔細些又要頗費力氣,還好在2.1.8時將一直沒有Commit到release repository的StrutsSpringTestCase放了出來,使Unit Test又更加方便。 下列寫個簡單例子:
public class FirstActionTest extends StrutsSpringTestCase{
	 public void testAction() throws Exception {
		  ActionProxy actionProxy  = this.getActionProxy ( "first!index.action");
		  Assert.assertNotNull(actionProxy);
		  FirstAction action = (FirstAction) actionProxy.getAction();
		  Assert.assertNotNull(action);

		 String result = actionProxy.execute();
		  Assert.assertEquals(FirstAction.SUCCESS , result);
	 }
}
ActionProxy actionProxy  =  this.getActionProxy("first!index.action");
FirstAction action = (FirstAction) actionProxy.getAction();
String result = actionProxy.execute();
this.getActionProxy()內帶入你實際在跑的uri,取得Action後再設定你要測的property,最後再run actionProxy.execute();就可以做成一個簡單的測試,如果需要改變Spring configuration xml的位置,請override protected String getContextLocations();
另外有兩點要注意,如果你使用wildcard如first_*來控制action的execution methed,請在測試時用!來分隔wildcard,trace了一段時間,還沒找出問題在哪...另一個是actionProxy.execute()會有找不到jsp的實際檔案的情形,但不影響測試,這部份應該是放到integration test就能解決。
<? xml   version= "1.0"   encoding= "UTF-8" ?>
< beans   xmlns = "http://www.springframework.org/schema/beans"
   xmlns:xsi = "http://www.w3.org/2001/XMLSchema-instance"  xmlns:context = "http://www.springframework.org/schema/context"
   xmlns:util = "http://www.springframework.org/schema/util"  xmlns:p = "http://www.springframework.org/schema/p"
   xmlns:tx = "http://www.springframework.org/schema/tx"  xmlns:aop = "http://www.springframework.org/schema/aop"
   xsi:schemaLocation = "http://www.springframework.org/schema/beans http://www.springframework.org/schema/beans/spring-beans.xsd
       http://www.springframework.org/schema/context http://www.springframework.org/schema/context/spring-context.xsd
       http://www.springframework.org/schema/tx   http://www.springframework.org/schema/tx/spring-tx.xsd
       http://www.springframework.org/schema/aop   http://www.springframework.org/schema/aop/spring-aop.xsd
       http://www.springframework.org/schema/util http://www.springframework.org/schema/util/spring-util.xsd ">

   < context:property-placeholder   location = "classpath:system.properties"  />

   < bean   id = "dataSource"  class = "com.mchange.v2.c3p0.ComboPooledDataSource">
    < property   name = "driverClass"  value = "${jdbc.driverClass}"  />
    < property   name = "jdbcUrl"  value = "${jdbc.url}"  />
    < property   name = "user"  value = "${jdbc.user}"  />
    < property   name = "password"  value = "${jdbc.password}"  />
    < property   name = "autoCommitOnClose"  value = "${jdbc.autoCommitOnClose}"  />
   </ bean>

   < bean   id = "entityManagerFactory"
    class = "org.springframework.orm.jpa.LocalContainerEntityManagerFactoryBean">
    < property   name = "persistenceXmlLocation"  value = "org/elliot/dao/jpaimpl/persistence.xml"  />
    < property   name = "dataSource"  ref = "dataSource"  />
    < property   name = "jpaVendorAdapter">
     < bean   class = "org.springframework.orm.jpa.vendor.HibernateJpaVendorAdapter">
      < property   name = "database"  value = "${hibernate.database}"  />
      < property   name = "showSql"  value = "${hibernate.show_sql}"  />
      < property   name = "generateDdl"  value = "${hibernate.generate_ddl}"  />
     </ bean>
    </ property>
    < property   name = "jpaPropertyMap">
     < props>
     < prop   key ="hibernate.cache.provider_class" > org.hibernate.cache.HashtableCacheProvider</ prop >
     </ props>
    </ property>
   </ bean>

   < bean   id = "entityManager"
    class = "org.springframework.orm.jpa.support.SharedEntityManagerBean">
    < property   name = "entityManagerFactory"  ref = "entityManagerFactory"  />
   </ bean>

   < bean   id = "transactionManager"  class = "org.springframework.orm.jpa.JpaTransactionManager">
    < property   name = "entityManagerFactory"  ref = "entityManagerFactory"  />
    < property   name = "dataSource"  ref = "dataSource"  />
   </ bean>

   < tx:annotation-driven  transaction-manager = "transactionManager"
    proxy-target-class= "true"   />

   < context:annotation-config  />
   < context:component-scan   base-package = "org.elliot.dao.jpaimpl,org.elliot.service"  />

</ beans>
< persistence   xmlns = "http://java.sun.com/xml/ns/persistence"
   xmlns:xsi = "http://www.w3.org/2001/XMLSchema-instance"
   xsi:schemaLocation = "http://java.sun.com/xml/ns/persistence http://java.sun.com/xml/ns/persistence/persistence_2_0.xsd"
   version= "2.0" >

   < persistence-unit   name = "Master"  transaction-type = "RESOURCE_LOCAL">
   < class > org.elliot.domain.Master</ class >
    < exclude-unlisted-classes/>
   </ persistence-unit>

</ persistence>
#h2database configurations
jdbc.driverClass= org.h2.Driver
jdbc.url = jdbc:h2:~/test
#jdbc.url=jdbc:h2:tcp://localhost/~/test
jdbc.user= sa
jdbc.password=
jdbc.autoCommitOnClose= true

hibernate.database= H2
hibernate.dialect = org.hibernate.dialect.H2Dialect
hibernate.show_sql= true
hibernate.format_sql= true
hibernate.generate_statistics= true
hibernate.hbm2ddl.auto= create
hibernate.cache.use_second_level_cache= true
hibernate.generate_ddl= true
<plugin>
 <groupId>org.mortbay.jetty</groupId>
 <artifactId>jetty-maven-plugin</artifactId>
 <version>7.0.2.v20100331</version>
 <configuration>
 <scanIntervalSeconds>10</scanIntervalSeconds>
 <webAppConfig>
 <contextPath>/sample</contextPath>
 </webAppConfig>
 <stopPort>9966</stopPort>
 <stopKey>stop</stopKey>
 </configuration>
</plugin>
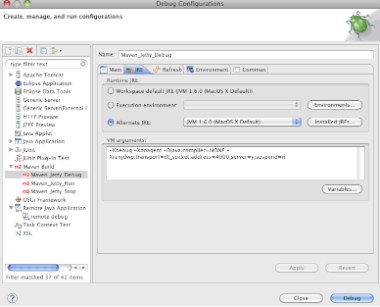 先同於Jetty Run一樣
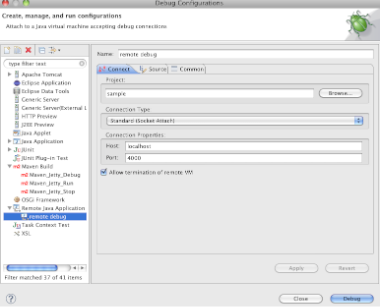 加入一個Remote Java Application的設定
這問題在最近一個月被問了三次,雖然沒什麼價值,想想還是寫出來好了。
不少朋友用Eclipse開了個Dynamic Web Project後再想加入Maven2作為Build Tool,但是由於兩者間的目錄結構不同而頗為困擾,這種情形下我比較建議修改pom.xml以符合現行Project的結構。
<build>
    <sourcedirectory>${basedir}/src</sourcedirectory>
    <outputdirectory>${basedir}/build/classes</outputdirectory>
    <resources>
     <resource>
     <directory>${basedir}/src</directory>
      <includes>
       <include>*.xml</include>
      <include>*.properties</include>
      </includes>
      <excludes>
       <exclude>**/.svn/</exclude>
      </excludes>
     </resource>
    </resources>
    <plugins>
     <plugin>
     <groupid> org.apache.maven.plugins</groupid>
     <artifactid> maven-compiler-plugin</artifactid>
      <version>2.1</version>
      <inherited>true</inherited>
      <configuration>
       <source>1.6</source>
       <target>1.6</target>
      </configuration>
     </plugin>
     <plugin>
     <groupid> org.apache.maven.plugins</groupid>
     <artifactid>maven-war-plugin</artifactid>
     <version>2.1-beta-1</version>
      <inherited>true</inherited>
      <configuration>
       <webappdirectory>${basedir}/WebContent</webappdirectory>
       <packagingexcludes>**/.svn/</packagingexcludes>
      </configuration>
     </plugin>
    </plugins>
   </build>
主要是<sourcedirectory>、<resources>跟maven-war-plugin中的<webappdirectory>
<packagingexcludes>加入**/.svn/則視情形而定,如果覺得.svn被包進war沒差也就沒關係了。
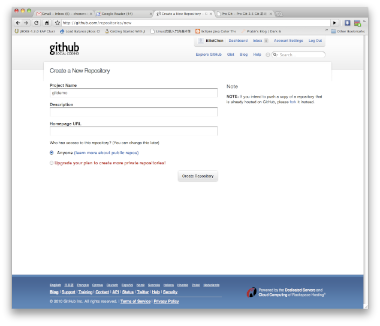
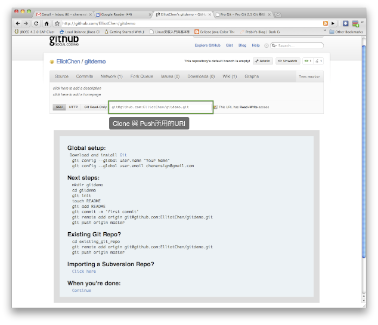
git init --no branch created.
touch README
git add README -- still no branch created.
git commit -m 'first commit' -- create a new branch named 'master', you have no choose....
git remote add origin git@github.com:AccountName/reponame.git --you can change 'origin' to any word you like
git push origin master -- If you don't like 'master', you have to use 'git checkout -b' and 'git branch -d master' to remove master branch.
State Pattern這個入門的Design Pattern,我想大多數人都不陌生,只是我工作這麼久,幾乎沒有看別人使用過,多半都是用if {} else {}, switch case來處理,這是我比較不能理解的情形。
一個程式有多種State,而且需要依目前不同State做出不同的反應,幾乎是每個系統一定會有的,
像電信業的使用者多半有prepaid, postpaid, unsubscribe,np等多種State;
還有所謂的Task,可能有Init, Scheduled, Triggered, Success, Fail等State,我看到的程式幾乎都是將State開放交給在外部程式利用setter來改變。
這樣也不是說不好,如果控制得當,系統當然也不會有什麼大問題,但是在每次系統要做事之前,一定要經過一大堆的State判斷,可能是if else,也可能是switch,才能決定能不能做,要做些什麼。
開發時間一長或是人員替換,再來看這個程式,就會有點傷腦筋,到底有多少種State,在什麼情形下會改變,又是誰改了這個State,很多問號就一直浮出來。
先說說我自己的常遇到的情形好了。
所謂的State多半有三種,Initial State, Alive State, Final State。
Initial State就是最開始的State(廢話..),而且幾乎只有一種,一開始都是處於這個State之下,再來會進入Alive或Final State,只要離開了Initial State就幾乎不會再回到Initial State了。
Alive State則是運作中的State,像是Scheduled, Triggered這種State,Alive State間可能會互相轉換,最終應該要進入Final State。
Final State是程式最後運行的終點,進入Final State之後就不應該再有任何改變,像是Success, Fail, Cancel這種詞意所代表的通常就是Final State。
也很有可能沒有Final State,像是User這種類型的Class,可能就僅在Active, Inactive, Suspended之類的State間轉換。
State間的轉換不應該是依靠setter來處理,而應該是一個Action(Method),這樣才能確保State是依照我們的控制在運作,而不會被天外飛來之物所改變。
這裡舉個簡單的例子,用常見的Task來看看吧。先利用enum列出可能的State。
public enum TaskStateEnum {
 Init, //Initial State
 Scheduled, //Alive State
 Triggered, //Alive State
 Retry, //Alive State
 Success, //Final State
 Fail, //Final State
 Canceled //Final State
}
這時候如果有個State Diagram的話就會很容易理解各個State間轉換的情形,但原讓諒小弟懶人一個....
一般寫出來的Task可能會像下面這樣
public class Task {
 private String oid;
 private Date scheduleTime;
 private TaskStateEnum taskStateEnum = TaskStateEnum.Init;

 public Task(String oid) {
  this.oid = oid;
 }

 public void schedule(Date scheduleTime) {
  if (null == scheduleTime) {
   throw new RuntimeException("scheduleTime can't be null value.");
  }
  //檢查State,僅有Init跟Scheduled的Task才能改變scheduleTime
  if (!(TaskStateEnum.Init == taskStateEnum || TaskStateEnum.Scheduled == taskStateEnum)) {
   System.out.println("Task["+oid+"] can't schedule from "+taskStateEnum);
   return;
  }
  this.taskStateEnum = TaskStateEnum.Scheduled;
  this.scheduleTime = scheduleTime;
 }

 public void execute() throws Exception {
  //檢查State,僅有Scheduled的Task才能進行execute
  if (!(TaskStateEnum.Scheduled == taskStateEnum)) {
   System.out.println("Task["+oid+"] can't execute from "+taskStateEnum);
   return;
  }
  //改變State為Trigger
  this.taskStateEnum = TaskStateEnum.Triggered;

  //oid為SuccessTask就直接進入Success,其餘則進入Retry。丟出Exception告訴TaskRunner執行有問題。
  if ("SuccessTask".equals(this.oid)) {
   this.taskStateEnum = TaskStateEnum.Success;
   System.out.println("Task["+this.oid+"] success at ["+this.scheduleTime+"].");
  } else {
   this.taskStateEnum = TaskStateEnum.Retry;
   throw new Exception("Task["+this.oid+"] fail.");
  }
 }

 public void retry() {
  //檢查State,僅有Retry的Task才需要再次處理,這使用switch並非必要,僅是為了demo麻煩的switch
  switch(taskStateEnum) {
  case Retry:
   //oid為RetryTask就直接進入Success,其餘則進入Fail。
   //這小Demo僅retry一次,若再失敗就直接Fail不再處理。
   if ("RetryTask".equals(this.oid)) {
    this.taskStateEnum = TaskStateEnum.Success;
    System.out.println("Task["+this.oid+"] success at ["+this.scheduleTime+"].");
   } else {
    this.taskStateEnum = TaskStateEnum.Fail;
    System.out.println("Task["+this.oid+"] fail at ["+this.scheduleTime+"].");
   }
   break;
  case Init:
  case Scheduled:
  case Triggered:
  case Success:
  case Fail:
  case Canceled:
  default:
   System.out.println("Task["+oid+"] can't retry from "+taskStateEnum);
  }
 }

 public void cancel() {
  //檢查State,僅有Init跟Scheduled等尚未被trigger的Task才能cancel。
  if (!(TaskStateEnum.Init == taskStateEnum || TaskStateEnum.Scheduled == taskStateEnum)) {
   System.out.println("Task["+oid+"] can't cancel from "+taskStateEnum);
   return;
  }
  taskStateEnum = TaskStateEnum.Canceled;
 }

 //盡量不要將setTaskStateEnum設為public,
 //否則將來出了問題就要找整個系統,但是如果用JDBC DAO之類的程式可能無法避免。
 protected void setTaskStateEnum(TaskStateEnum taskStateEnum) {
  this.taskStateEnum = taskStateEnum;
 }

 public String getOid() {
  return oid;
 }

 public Date getScheduleTime() {
  return scheduleTime;
 }

 public TaskStateEnum getTaskStateEnum() {
  return taskStateEnum;
 }

 protected void setScheduleTime(Date scheduleTime) {
  this.scheduleTime = scheduleTime;
 }

}
其中的schedule、execute、retry、cancel等就是所謂的Action,Action在執行時會造成TaskStateEnum的轉換,這裡使用最常見的if else 與 switch方式來檢查TaskStateEnum,然後直接使用this.taskStateEnum = XXX來改變TaskStateEnum。
要想將這個if else 跟 switch去除,就要靠State Pattern囉。
public interface State {

 void schedule(Date scheduleTime);
 void execute() throws Exception;
 void retry();
 void cancel();

 //讓外界明白目前是什麼State
 TaskStateEnum getStateEnum();
}
第二步再訂一個基本的實做AbstractState,利用這個AbstractState將所有的Action預設為無作用,可以簡化後面的開發。
public abstract class AbstractState implements State {
 protected NewTask task;
 protected TaskStateEnum stateEnum;

 public AbstractState(NewTask task, TaskStateEnum stateEnum) {
  this.task = task;
  this.stateEnum = stateEnum;
 }

 @Override
 public TaskStateEnum getStateEnum() {
  return stateEnum;
 }

 @Override
 public void cancel() {
  System.out.println("Task["+task.getOid()+"] can't cancel from "+stateEnum);
 }

 @Override
 public void execute() throws Exception {
  System.out.println("Task["+task.getOid()+"] can't execute from "+stateEnum);
 }

 @Override
 public void retry() {
  System.out.println("Task["+task.getOid()+"] can't retry from "+stateEnum);
 }

 @Override
 public void schedule(Date scheduleTime) {
  System.out.println("Task["+task.getOid()+"] can't schedule from "+stateEnum);
 }

}
第三步再依據TaskStateEnum中的Initial、Alive、Final State建立Class,通常Alive State會自行擁有一個Class,而Final State可以共用一個Class,各個State implementation間會互相認識,並且利用task 的switchState()來要求task轉換State,
public class InitState extends AbstractState {

 public InitState(NewTask task) {
  super(task, TaskStateEnum.Init);
 }

 @Override
 public void schedule(Date scheduleTime) {
  this.task.switchState(new ScheduledState(task));
  this.task.setScheduleTime(scheduleTime);
 }

}

//因為Final State什麼事都不能做,所以幾乎等於AbstractState
public class FinalState extends AbstractState {

 public FinalState(NewTask task, TaskStateEnum stateEnum) {
  super(task, stateEnum);
 }

}

public class ScheduledState extends AbstractState {

 public ScheduledState(NewTask task) {
  super(task, TaskStateEnum.Scheduled);
 }

 @Override
 public void schedule(Date scheduleTime) {
  this.task.setScheduleTime(scheduleTime);
 }

 @Override
 public void execute() throws Exception {
  this.task.switchState(new TriggeredState(task));

  if ("SuccessTask".equals(this.task.getOid())) {
   this.task.switchState(new FinalState(task, TaskStateEnum.Success));
   System.out.println("Task["+this.task.getOid()+"] success at ["+this.task.getScheduleTime()+"].");
  } else {
   this.task.switchState(new RetryState(task));
   throw new Exception("Task["+this.task.getOid()+"] fail.");
  }
 }

}

public class TriggeredState extends AbstractState {

 public TriggeredState(NewTask task) {
  super(task, TaskStateEnum.Triggered);
 }

}

public class RetryState extends AbstractState {

 public RetryState(NewTask task) {
  super(task, TaskStateEnum.Retry);
 }

 @Override
 public void retry() {
  if ("RetryTask".equals(this.task.getOid())) {
   this.task.switchState(new FinalState(task, TaskStateEnum.Success));
   System.out.println("Task["+this.task.getOid()+"] success at ["+this.task.getScheduleTime()+"].");
  } else {
   this.task.switchState(new FinalState(task, TaskStateEnum.Fail));
   System.out.println("Task["+this.task.getOid()+"] fail at ["+this.task.getScheduleTime()+"].");
  }
 }
}
最後就修改Task,將TaskStateEnum轉換的機制改一下
 //加入State做為Action的delegater。
 private State state = null;

 public Task(String oid) {
  this.oid = oid;
  this.initState();
 }

 //無論是誰要改變taskStateEnum都必需提供State的實做,
 //以免Task與taskStateEnum的行為不一致
 public void switchState(State newState) {
  this.state = newState;
  this.taskStateEnum = newState.getStateEnum();
 }

 //利用目前的taskStateEnum來取得對應的State implementation
 public void initState() {
  switch(taskStateEnum) {
  case Scheduled:
   this.state = new ScheduledState(this);
   break;
  case Triggered:
   this.state = new TriggeredState(this);
   break;
  case Retry:
   this.state = new RetryState(this);
   break;
  case Success:
  case Fail:
  case Canceled:
   this.state = new FinalState(this, taskStateEnum);
   break;
  case Init:
  default:
   this.state = new InitState(this);
  }
 }
簡化後的Task就長得像下面這樣囉
public class Task {
 private String oid;
 private Date scheduleTime;
 private TaskStateEnum taskStateEnum = TaskStateEnum.Init;
 private State state = null;

 public Task(String oid) {
  this.oid = oid;
  this.initState();
 }

 public void schedule(Date scheduleTime) {
  this.state.schedule(scheduleTime);
 }

 public void execute() throws Exception {
  this.state.execute();
 }

 public void retry() {
  this.state.retry();
 }

 public void cancel() {
  this.state.cancel();
 }

 public String getOid() {
  return oid;
 }

 public Date getScheduleTime() {
  return scheduleTime;
 }

 public TaskStateEnum getTaskStateEnum() {
  return taskStateEnum;
 }

 protected void setScheduleTime(Date scheduleTime) {
  this.scheduleTime = scheduleTime;
 }

 protected void setTaskStateEnum(TaskStateEnum taskStateEnum) {
  this.taskStateEnum = taskStateEnum;
 }

 public void switchState(State newState) {
  this.state = newState;
  this.taskStateEnum = newState.getStateEnum();
 }

 public void initState() {
  switch(taskStateEnum) {
  case Scheduled:
   this.state = new ScheduledState(this);
   break;
  case Triggered:
   this.state = new TriggeredState(this);
   break;
  case Retry:
   this.state = new RetryState(this);
   break;
  case Success:
  case Fail:
  case Canceled:
   this.state = new FinalState(this, taskStateEnum);
   break;
  case Init:
  default:
   this.state = new InitState(this);
  }
 }
}
去除了惱人的if else 跟 switch,更容易聚焦在要修改的Action,State的轉換更是清楚(有State Diagram的話)。
只是多了很多Class....所以好不好也是見仁見智啦,有的人也就是不喜歡這麼多Class吧。
State Pattern是Design Pattern中很基礎的一種,小弟在這斗膽在這耍下小刀,高人見到莫笑啊....
public class TaskTest {
 Task task = null;

 @Test
 public void testSuccessTask() {
  task = new Task("SuccessTask");
  task.schedule(new Date());
  try {
   task.execute();
  } catch (Exception e) {
   Assert.fail();
  }
  Assert.assertEquals(TaskStateEnum.Success, task.getTaskStateEnum());
 }

 @Test
 public void testRetryTask() {
  task = new Task("RetryTask");
  task.schedule(new Date());
  try {
   task.execute();
   Assert.fail(); //task must throw exception
  } catch (Exception e) {
   task.retry();
  }
  Assert.assertEquals(TaskStateEnum.Success, task.getTaskStateEnum());
 }

 @Test
 public void testFailTask() {
  task = new Task("FailTask");
  task.schedule(new Date());
  try {
   task.execute();
   Assert.fail(); //task must throw exception
  } catch (Exception e) {
   task.cancel(); //Triggered Task can't be canceled.
   Assert.assertEquals(TaskStateEnum.Retry, task.getTaskStateEnum());
   task.retry();
  }
  Assert.assertEquals(TaskStateEnum.Fail, task.getTaskStateEnum());
 }
}
package org.elliot.di;

public interface Module {
 public String getModuleName();
}
package org.elliot.di;

import org.springframework.stereotype.Component;

@Component //Spring component => a bean
public class DefaultModule implements Module{
 public String getModuleName() {
  return "Default";
 }
}
訂了一個非常沒用的Interface,再實作一個很無聊的Implementation,DefaultModule上訂的@Component是Spring自定的,也可以改用JSR-299所定的@Resource,這個的做用基本上就是將它當做是之前Spring xml configuration中所訂的一個beanpackage org.elliot.di;
import org.springframework.beans.factory.annotation.Autowired;
import org.springframework.stereotype.Component;
import com.google.inject.Inject;
@Component //Spring component => a bean
public class Service {
@Autowired //Spring Autowired
@Inject //Guice Inject
private Module module;
public Module getModule() {
return module;
}
public void setModule(Module module) {
this.module = module;
}
public void showModuleName() {
System.out.println(this.module.getModuleName());
}
}
Service提供一個被注入的標的module,@Autowired是Spring的Annotaion,@Inject則是Guice的Annotaion,做用雷同,代表這是一個可以被注入的Field。package org.elliot.guice;
import org.elliot.di.DefaultModule;
import org.elliot.di.Module;
import com.google.inject.AbstractModule;
public class GuiceConfigModule extends AbstractModule {
@Override
protected void configure() {
bind(Module.class).to(DefaultModule.class);
}
}
必需要extends AbstractModule,實做protected void configure();這裡指定了只要Field型態是Module的都用DefaultModule的instance來注入。package org.elliot.guice;
import static org.junit.Assert.assertNotNull;
import org.elliot.di.Service;
import org.junit.Before;
import org.junit.Test;
import com.google.inject.Guice;
import com.google.inject.Injector;
public class GuiceDITest {
private Service service;
@Before
public void setUp() throws Exception {
Injector injector = Guice.createInjector(new GuiceConfigModule());
service = injector.getInstance(Service.class);
}
@Test
public void testGuice() {
assertNotNull(service.getModule());
service.showModuleName();
}
}
這是Guice的簡單測試,例用Guice.createInjector來產生一個Injector,這個Injector就同於Spring的Context,你需要相關的instance都跟Injector要。package org.elliot.spring;
import static org.junit.Assert.assertNotNull;
import org.elliot.di.Service;
import org.junit.Before;
import org.junit.Test;
import org.springframework.context.annotation.AnnotationConfigApplicationContext;
public class SpringDITest {
private Service service;
@Before
public void setUp() throws Exception {
AnnotationConfigApplicationContext context =
new AnnotationConfigApplicationContext("org.elliot");
service = context.getBean(Service.class);
}
@Test
public void testGuice() {
assertNotNull(service.getModule());
service.showModuleName();
}
}
基本上就是將之前常用的ClassPathXmlApplicationContext, FileSystemXmlApplicationContext換成AnnotationConfigApplicationContext。@Retention(RetentionPolicy.RUNTIME)
@Target({ElementType.TYPE, ElementType.METHOD})
@Inherited
public @interface InheritedAnn {
}
@Retention(RetentionPolicy.RUNTIME)
@Target({ElementType.TYPE, ElementType.METHOD})
public @interface NonInheritedAnn {
}
上列兩個Annotation僅差別在有無@Inherited。簡單看一下@Inherited對extends跟implements的影響@InheritedAnn
@NonInheritedAnn
public class Parent {
@InheritedAnn
@NonInheritedAnn
public void notBeOverrided() {}
@InheritedAnn
@NonInheritedAnn
public void beOverrided() {}
}
public class Child extends Parent {
@Override
public void beOverrided() {}
}
@InheritedAnn
public interface SimpleInterface {
@InheritedAnn
void simple();
}
public class SimpleImpl implements SimpleInterface {
@Override
public void simple() {}
}
寫個Test吧import static junit.framework.Assert.assertNotNull;
import static junit.framework.Assert.assertNull;
import static junit.framework.Assert.fail;
import java.lang.reflect.Method;
import org.junit.Test;
public class AnnTest {
/**
* 驗証具有@Inherited 的Annotation可以透過extends保留在subclass中
*/
@Test
public void testConcreteClassInheritence() throws Exception {
//測試Annotated Type,僅具有@Inherited會被保留
assertNotNull(Child.class.getAnnotation(InheritedAnn.class));
assertNull(Child.class.getAnnotation(NonInheritedAnn.class));
//測試沒被Override 的Annotated Method,無論是否有@Inherited皆會被保留
Method notBeOverrided = Child.class.getMethod("notBeOverrided", null);
assertNotNull(notBeOverrided.getAnnotation(InheritedAnn.class));
assertNotNull(notBeOverrided.getAnnotation(NonInheritedAnn.class));
//測試被Override 的Annotated Method,無論是否有@Inherited皆不會被保留
Method beOverrided = Child.class.getMethod("beOverrided", null);
assertNull(beOverrided.getAnnotation(InheritedAnn.class));
assertNull(beOverrided.getAnnotation(NonInheritedAnn.class));
}
/**
* 驗証即便具有@Inherited 的Annotation仍無法透過implements interface保留
*/
@Test
public void testInterfaceInheritence() throws Exception {
//無論是Type或Method皆無法保留Annotation
//測試Annotated Type
assertNull(SimpleImpl.class.getAnnotation(InheritedAnn.class));
//測試Annotated Method
Method simple = SimpleImpl.class.getMethod("simple", null);
assertNull(simple.getAnnotation(InheritedAnn.class));
}
}
TrackingStack.enable();
TrackingStack.push("Execution");
TrackingStack.push("Step1");
//Does something
TrackingStack.pop("Step1");

TrackingStack.push("Step2");
//Does something
TrackingStack.pop("Step2");
TrackingStack.pop("Execution");
跑出來的結果大概會長得像下面這樣[Execution]:243 ms [Step1]:102 ms [Step2]:104 ms
import org.slf4j.Logger;
import org.slf4j.LoggerFactory;

public class TrackingStack {
 private static final Logger logger = LoggerFactory.getLogger(TrackingStack.class);
 private static ThreadLocal current = new ThreadLocal();
 private static boolean ENABLE = false;

 public static final void push(String execution) {
  if (!ENABLE) {
   return;
  }

  ProfilingBean newPb = new ProfilingBean(execution);
  newPb.start();
  if (null == current.get()) {
   current.set(newPb);
  } else {
   current.get().addChild(newPb);
  }

  current.set(newPb);
 }

 public static final void pop(String execution) {
  if (!ENABLE) {
   return;
  }
  ProfilingBean currentPb = current.get();

  if (null == currentPb) {
   return;
  }

  if (currentPb.getExecution().equals(execution)) {
   currentPb.end();

   if (null != currentPb.getParent()) {
    current.set(currentPb.getParent());
   } else {
    logger.info(currentPb.getProfilingMessage());
    current.set(null);
   }
  } else {
   logger.info("Current execution sould be [{}], not [{}]", currentPb.getExecution(), execution);
  }
 }

 public static final void enable() {
  ENABLE = true;
 }

 public static final void disable() {
  ENABLE = false;
 }
}
import java.util.ArrayList;

import org.slf4j.Logger;
import org.slf4j.LoggerFactory;

public class ProfilingBean {
 private static final Logger logger = LoggerFactory.getLogger(ProfilingBean.class);
 private ArrayList children = new ArrayList();
 private ProfilingBean parent = null;

 private String execution;

 private long startTime;
 private long endTime;

 public ProfilingBean(String execution) {
  this.execution = execution;
 }

 public String getExecution() {
  return this.execution;
 }

 public void start() {
  this.startTime = System.currentTimeMillis();
 }

 public long getStartTime() {
  return this.startTime;
 }

 public void end() {
  this.endTime = System.currentTimeMillis();
 }

 public long getEndTime() {
  return this.endTime;
 }

 public long getTotalTime() {
  return this.endTime - this.startTime;
 }

 public void setParent(ProfilingBean parent) {
  this.parent = parent;
 }

 public ProfilingBean getParent() {
  return this.parent;
 }

 public void addChild(ProfilingBean child) {
  if (null == child) {
   logger.warn("Child should't be null");
   return;
  }
  this.children.add(child);
  child.setParent(this);
 }

 public String getProfilingMessage() {
  return this.getProfilingMessage("");
 }

 private String getProfilingMessage(String indent) {
  StringBuilder sb = new StringBuilder();
  sb.append("\n" + indent + "[" + this.execution + "]:" + (this.endTime - this.startTime) + " ms");
  for (ProfilingBean pb : this.children) {
   sb.append(pb.getProfilingMessage(indent + "\t"));
  }
  return sb.toString();
 }
}
public void doFilter(ServletRequest request, ServletResponse response,
    FilterChain chain) throws IOException, ServletException {
    HttpSession session = (HttpServletRequest) request.getSession();
    User user = (User) session.get("User");
    if (null != user) {
        ThreadLocalHolder.putUser(user);
        MDC.put("username", user.getName());
    }
    try {
      chain.doFilter(request, response);
    } finally {
      if (null != user) {
        MDC.remove("username");
      }
    }
  }